This blog post walks you through the complete Azure App Registration process, including the subsequent Exchange Online PowerShell commands needed to achieve the OAuth2 client credentials flow for Office365 email sending and reading via the SMTP, IMAP, and POP3 protocols.
I wish there was an “easy button”, but unfortunately it does not exist.
Step 1. Register an Azure App
Go to portal.azure.com, then go to Microsoft Entra ID and click on “+ New registration”. Register a new single tenant App like this:
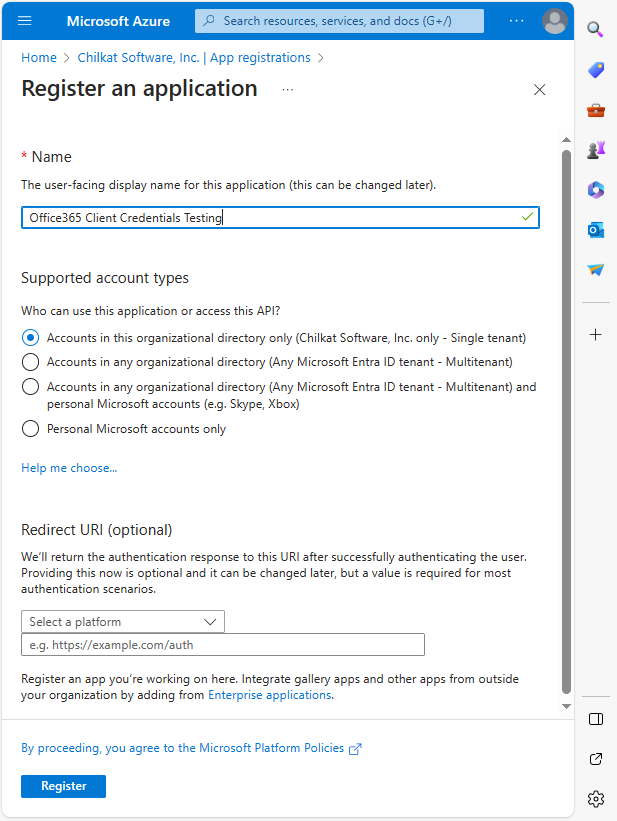
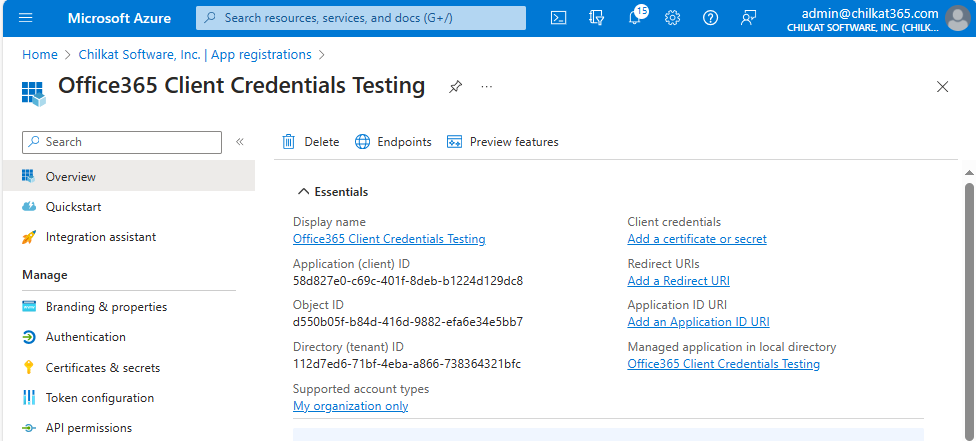
* Note your Application (client) ID and your Directory (tenant) ID. You’ll need these later.
Step 2. Create a Client Secret
Go to “Certificates & secrets”, click on “+ New client secret”.
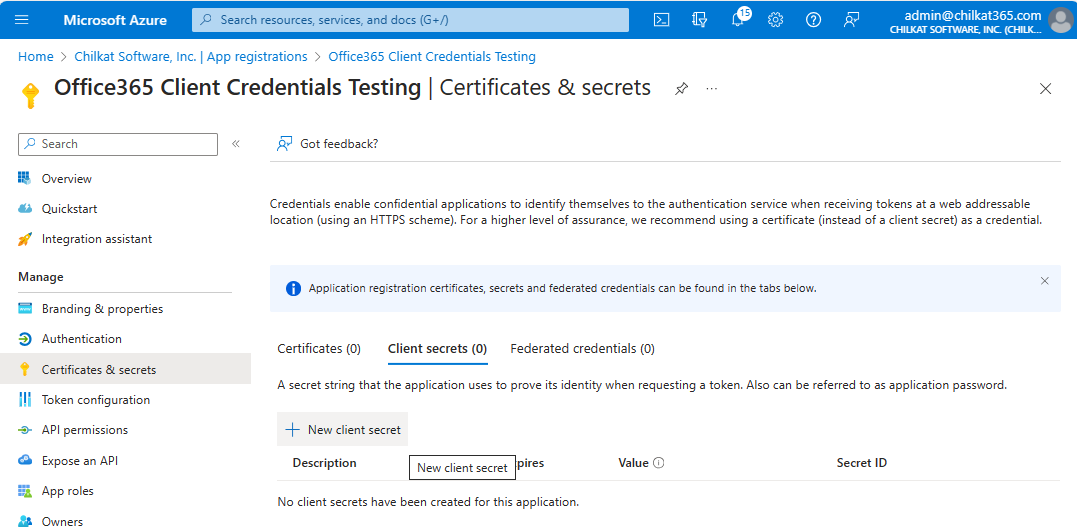
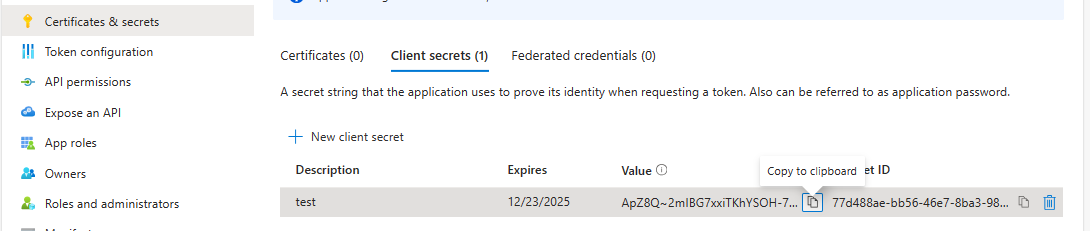
You’ll see the following after creating the secret.
Copy the Secret Value (ApZ8Q~2mlBG7….) to the clipboard, and then save it elsewhere. You won’t have a chance to copy the secret Value again, so you must get it here.
Step 3. Add Permissions
Click on “API permissions” and then “+ Add a permission”.

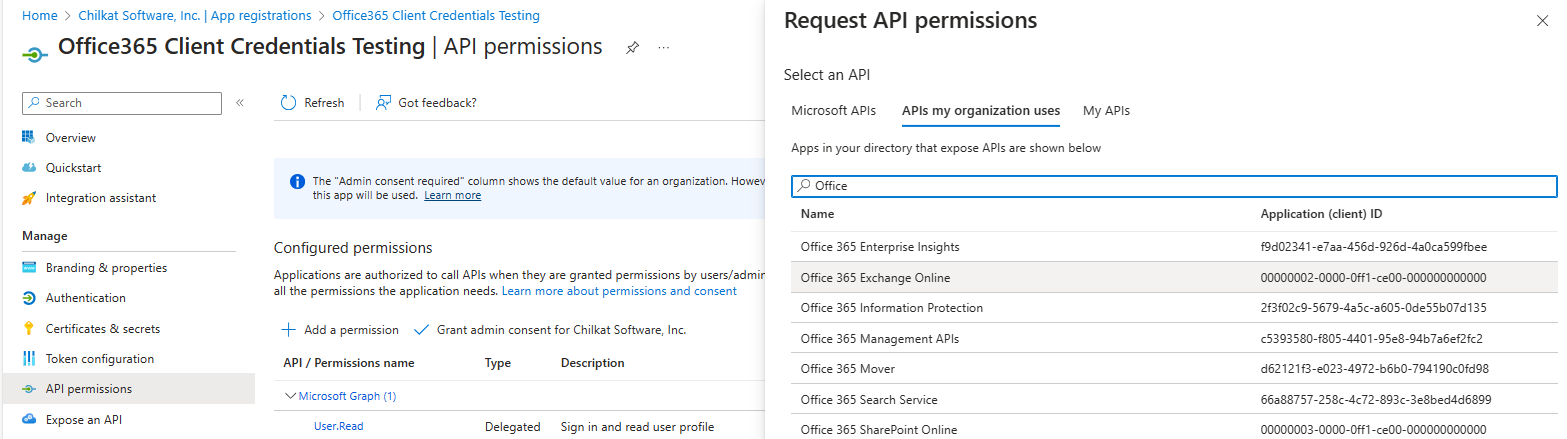
Select the “APIs my organization uses” tab, then type “Office” in the search bar, and select “Office 365 Exchange Online”.
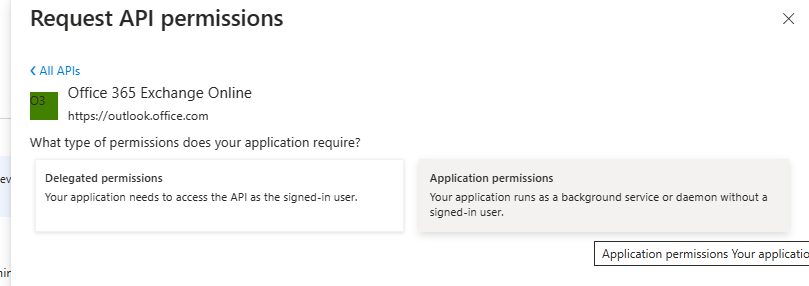
Select “Application Permissions”
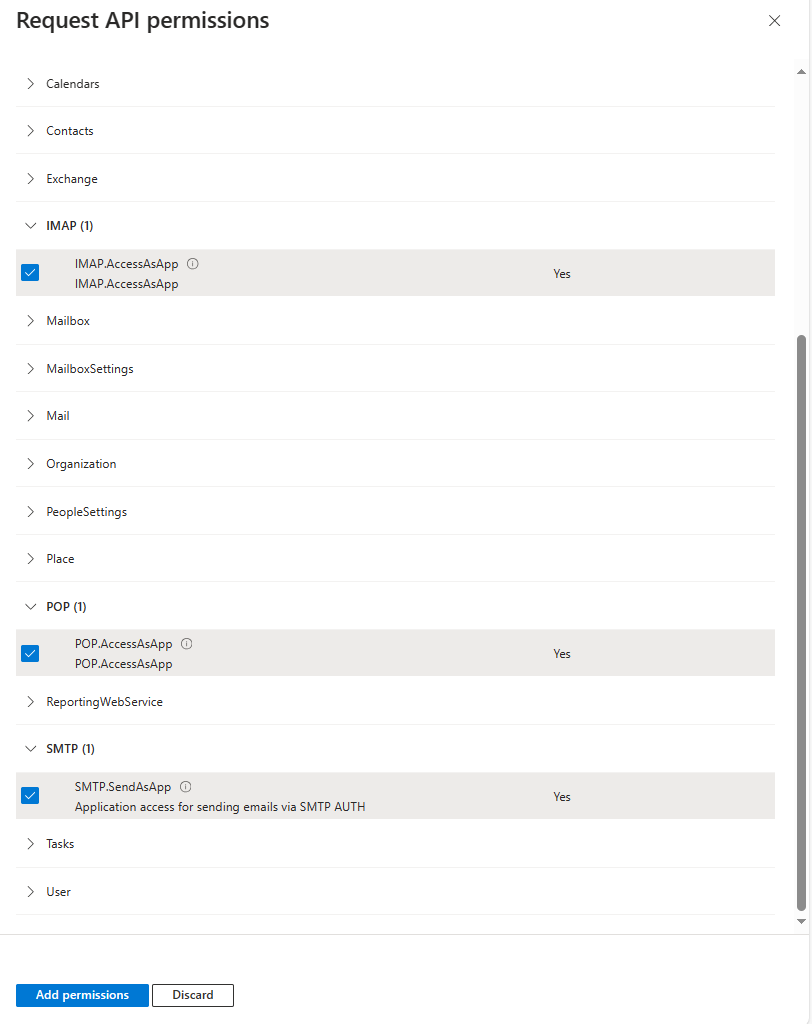
Select IMAP.AccessAsApp, POP.AccessAsApp, and SMTP.SendAsApp, then click “Add permissions”
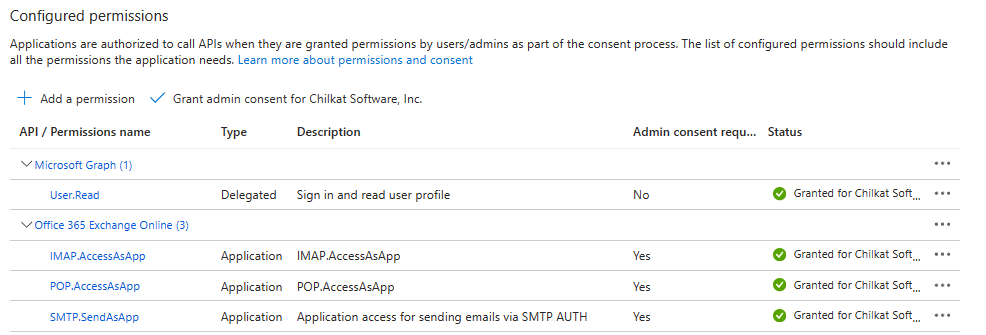
You should see the following. Click on “Grand admin consent for <your Azure organization’s name>”
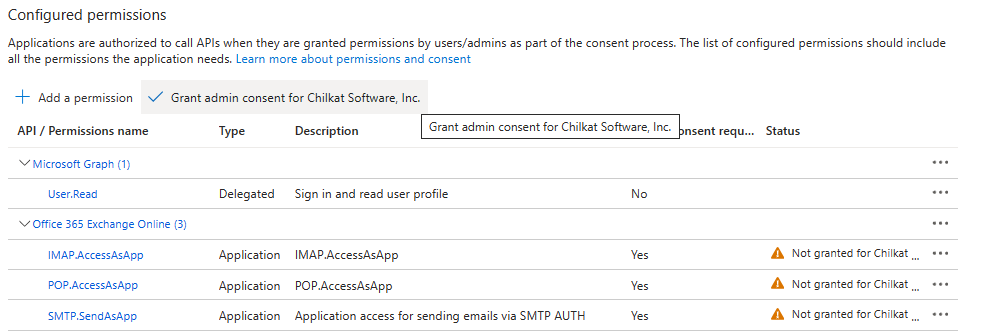
Now you will see the following.
4. Required Exchange Online PowerShell Setup Commands
Start a PowerShell command prompt.
Begin by running the following commands:
Install-Module -Name ExchangeOnlineManagement -allowprerelease
Import-module ExchangeOnlineManagement
Connect-ExchangeOnline -Organization <tenantId>
Next, you’ll need to create a new service principle using your Application (client) ID, and an Object ID.
The Object ID is NOT what you think. I’ll explain where to get it.
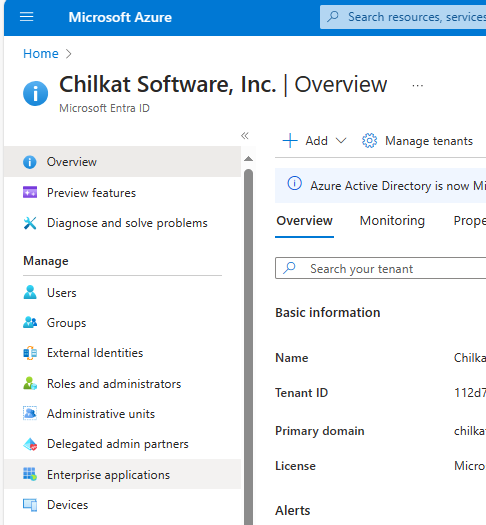
In the Azure Portal, in Microsoft Entra ID, click on Enterprise Applications.
You should see the application you created (from Step 1 above) because it should have the same descriptive name AND the same Application ID.
However, the Object ID here is different than elsewhere. This is the Object ID you need.
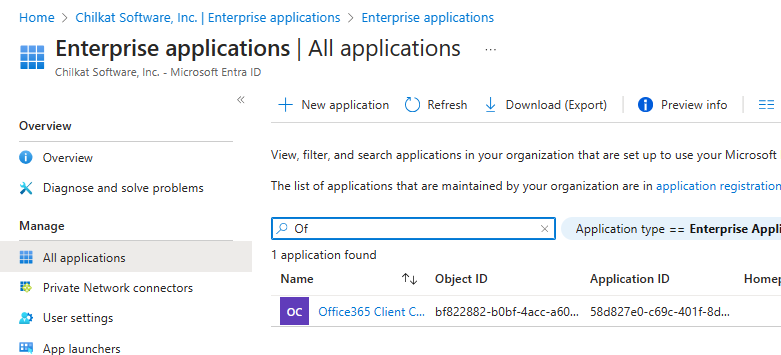
Click on the application (in this case “Office365 Client C…”)

Copy the Object ID. This is the Object ID we’ll need for the next Exchange Online Powershell Command.
In this sample case, our Application ID is 58d827e0-c69c-401f-8deb-b1224d129dc8 and our Object ID is bf822882-b0bf-4acc-a606-7da6b107a435
Run the following command, but use your application ID and object ID.
New-ServicePrincipal -AppId 58d827e0-c69c-401f-8deb-b1224d129dc8 -ObjectId bf822882-b0bf-4acc-a606-7da6b107a435
You should see output such as the following:
DisplayName                              ObjectId                                AppId
-----------                              --------                                -----
                                         bf822882-b0bf-4acc-a606-7da6b107a435    58d827e0-c69c-401f-8deb-b1224d129dc8
You can verify your newly created service principle by running the “Get-ServicePrincipal | fl” command. For example:
PS: C:\Test> Get-ServicePrincipal | fl

DisplayName            :
AppId                  : 58d827e0-c69c-401f-8deb-b1224d129dc8
ObjectId               : bf822882-b0bf-4acc-a606-7da6b107a435
Sid                    : S-1-5-21-473323585-2664515094-675076156-48422974
SidHistory             : {}
Identity               : bf822882-b0bf-4acc-a606-7da6b107a435
Id                     : bf822882-b0bf-4acc-a606-7da6b107a435
IsValid                : True
ExchangeVersion        : 1.1 (15.0.0.0)
Name                   : bf822882-b0bf-4acc-a606-7da6b107a435
DistinguishedName      : CN=bf822882-b0bf-4acc-a606-7da6b107a435,OU=chilkatsoftcom.onmicrosoft.com,OU=Microsoft
                         Exchange Hosted Organizations,DC=NAMPR22A003,DC=PROD,DC=OUTLOOK,DC=COM
ObjectCategory         : NAMPR22A003.PROD.OUTLOOK.COM/Configuration/Schema/Person
ObjectClass            : {top, person, organizationalPerson, user}
WhenChanged            : 12/24/2023 8:20:33 AM
WhenCreated            : 12/24/2023 8:20:33 AM
WhenChangedUTC         : 12/24/2023 2:20:33 PM
WhenCreatedUTC         : 12/24/2023 2:20:33 PM
ExchangeObjectId       : 17bef34d-f234-4d25-a003-5b15eecbc691
OrganizationalUnitRoot : chilkatsoftcom.onmicrosoft.com
OrganizationId         : NAMPR22A003.PROD.OUTLOOK.COM/Microsoft Exchange Hosted
                         Organizations/chilkatsoftcom.onmicrosoft.com -
                         NAMPR22A003.PROD.OUTLOOK.COM/ConfigurationUnits/chilkatsoftcom.onmicrosoft.com/Configuration
Guid                   : 17bef34d-f234-4d25-a003-5b15eecbc691
OriginatingServer      : SN4PR22A003DC01.NAMPR22A003.PROD.OUTLOOK.COM
ObjectState            : Changed
Finally, add FullAccess mailbox permissions for the email address to be accessed via SMTP, IMAP, and/or POP3. Notice the value for -User is the Object ID from above.
PS: C:\Test> Add-MailboxPermission -Identity "joe@example.com" -User bf822882-b0bf-4acc-a606-7da6b107a435 -AccessRights FullAccess

Identity             User                 AccessRights                                                IsInherited Deny
--------             ----                 ------------                                                ----------- ----
Joe Smith            S-1-5-21-47332358... {FullAccess}                                                False       False
Step 5. Finished.
That’s all. Now that you have things setup, you can obtain an access token using client credentials (i.e. no interactive browser involved) and you can send/read email from your application using Chilkat in the same way in many different programming languages. Links to examples will be coming soon..