Chilkat now has an Online SOAP WSDL Code Generator
You can generate code and SOAP request/response XML from an online WSDL URL. The cumbersome and complicated procedure below is no longer needed.
See the new Chilkat SOAP WSDL Code Generator at https://tools.chilkat.io/soap_wsdl_generate_code
These are the old instructions for using SoapUI. It is much easier to use the Online SOAP WSDL Code Generation tool at https://tools.chilkat.io/soap_wsdl_generate_code
Step 1.
Download and install SoapUI from here: https://www.soapui.org/downloads/soapui.html
Step 2.
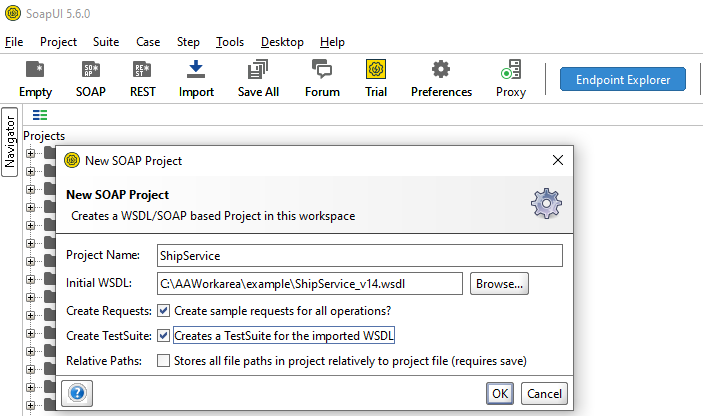
Start SoapUI click on the toolbar icon to create a new SOAPUI project. Initialize it with WSDL from a file or from a URL. Also check the checkbox to Create TestSuite:
Step 3.
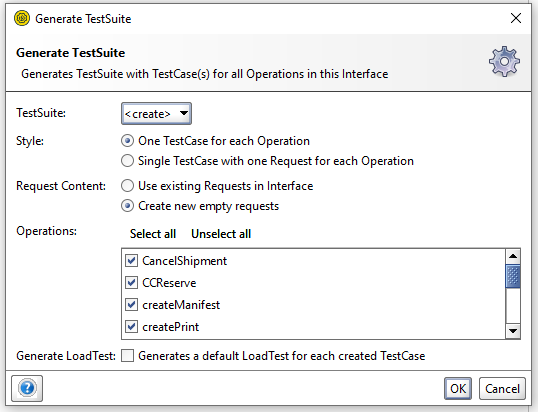
Click “OK” in the next dialog to generate the test suite:
Step 4.
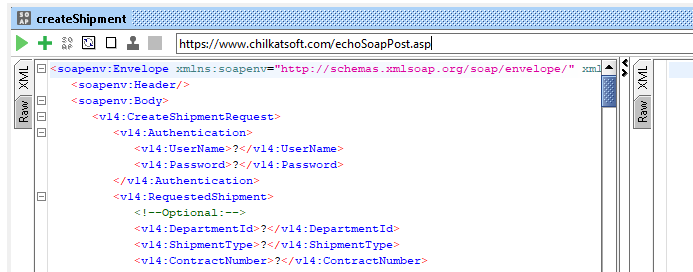
Double-click on a test case. For example, in the screen shot below I double-clicked on “createShipment” to bring up the createShipment window showing the URL and SOAP XML.

Step 5.
Copy the URL and set it aside, you’ll need it later. In this case, the URL is “https://expresslink-uat1.neopost-id.com/ws/”
Replace the URL with this URL: https://www.chilkatsoft.com/echoSoapPost.asp
We’re going to run the test, but instead of sending the request to the actual server, it is sent to https://www.chilkatsoft.com/echoSoapPost.asp which will respond by showing us the exact HTTP request it received.
Step 6.
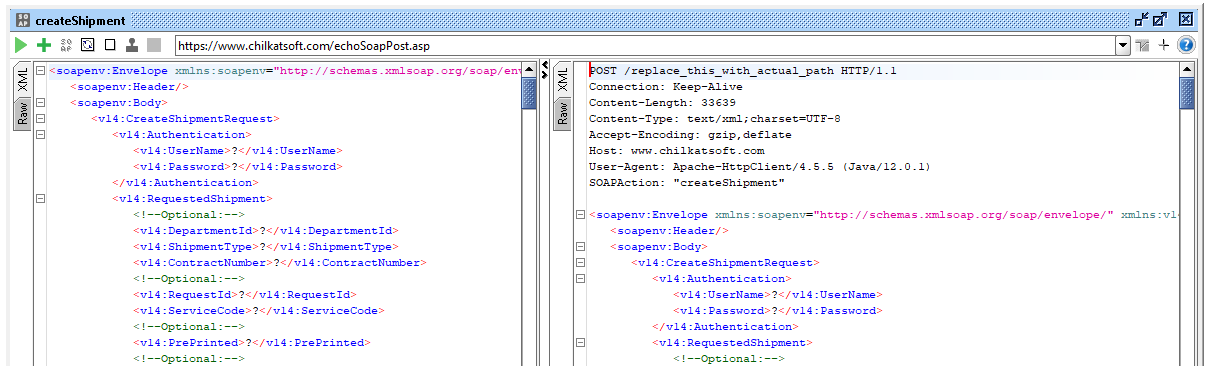
Run the test by clicking on the green triangle. ![]()
You’ll see the result in the right-hand pane:
Step 7.
Open a browser and go to https://tools.chilkat.io/httpRequestToCode
Copy the complete contents of the right-hand pane into Chilkat’s online tool: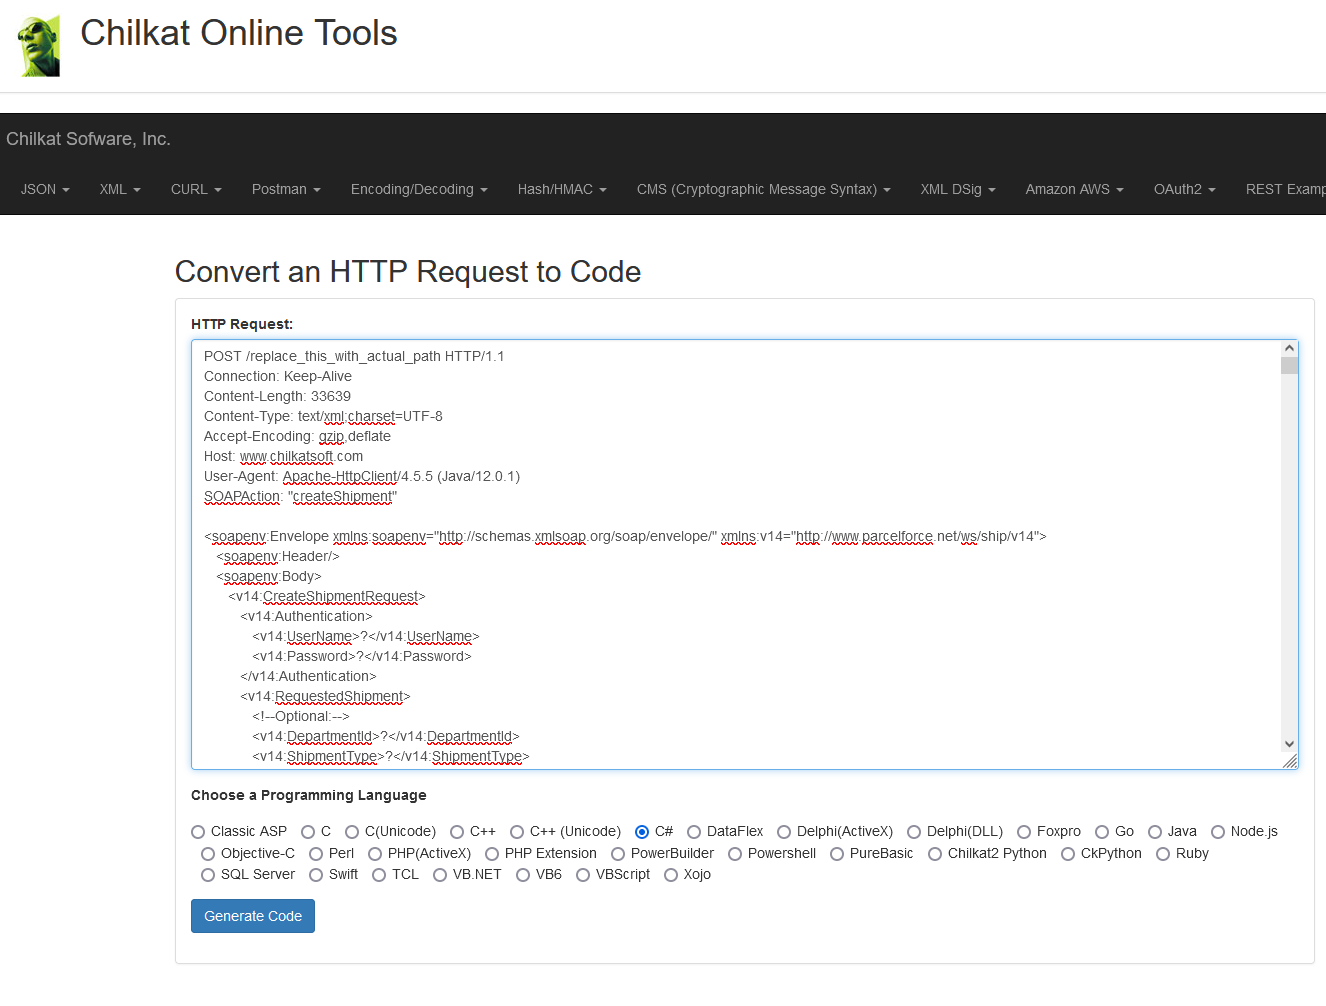
Step 8 (Final Step)
Select a programming language, and generate the code.
A few simple edits are required (listed below). I’ll describe the edits for generated code in C#, but the same edits apply for any programming language.

1) Remove the line of code that sets the Host header. You don’t need it. Chilkat will automatically set the Host header based on the URL passed to PTextSb.
2) Remove the line of code that sets the User-Agent. It’s not needed.
3) Change the URL passed to PTextSb to the URL previously saved. In this example, the URL to be used is https://expresslink-uat1.neopost-id.com/ws/